Nibbles is a fun and easy Linux machine that will test your ability to perform basic web enumeration and exploit a known vulnerability that exists on Nibble blog. Initial exploitation will achieve user access, but additional privilege escalation will be required to obtain system access.
Reconnaissance
nmap -A -T4 -p- 10.129.49.50Starting Nmap 7.92 ( https://nmap.org ) at 2022-10-07 15:43 EDT
Nmap scan report for 10.129.49.50
Host is up (0.039s latency).
Not shown: 65533 closed tcp ports (reset)
PORT STATE SERVICE VERSION
22/tcp open ssh OpenSSH 7.2p2 Ubuntu 4ubuntu2.2 (Ubuntu Linux; protocol 2.0)
| ssh-hostkey:
| 2048 c4:f8:ad:e8:f8:04:77:de:cf:15:0d:63:0a:18:7e:49 (RSA)
| 256 22:8f:b1:97:bf:0f:17:08:fc:7e:2c:8f:e9:77:3a:48 (ECDSA)
|_ 256 e6:ac:27:a3:b5:a9:f1:12:3c:34:a5:5d:5b:eb:3d:e9 (ED25519)
80/tcp open http Apache httpd 2.4.18 ((Ubuntu))
|_http-title: Site doesn’t have a title (text/html).
|_http-server-header: Apache/2.4.18 (Ubuntu)
No exact OS matches for host (If you know what OS is running on it, see https://nmap.org/submit/ ).
TCP/IP fingerprint:
OS:SCAN(V=7.92%E=4%D=10/7%OT=22%CT=1%CU=38796%PV=Y%DS=2%DC=T%G=Y%TM=6340819
OS:F%P=x86_64-pc-linux-gnu)SEQ(SP=108%GCD=1%ISR=10C%TI=Z%CI=I%II=I%TS=8)OPS
OS:(O1=M539ST11NW7%O2=M539ST11NW7%O3=M539NNT11NW7%O4=M539ST11NW7%O5=M539ST1
OS:1NW7%O6=M539ST11)WIN(W1=7120%W2=7120%W3=7120%W4=7120%W5=7120%W6=7120)ECN
OS:(R=Y%DF=Y%T=40%W=7210%O=M539NNSNW7%CC=Y%Q=)T1(R=Y%DF=Y%T=40%S=O%A=S+%F=A
OS:S%RD=0%Q=)T2(R=N)T3(R=N)T4(R=Y%DF=Y%T=40%W=0%S=A%A=Z%F=R%O=%RD=0%Q=)T5(R
OS:=Y%DF=Y%T=40%W=0%S=Z%A=S+%F=AR%O=%RD=0%Q=)T6(R=Y%DF=Y%T=40%W=0%S=A%A=Z%F
OS:=R%O=%RD=0%Q=)T7(R=Y%DF=Y%T=40%W=0%S=Z%A=S+%F=AR%O=%RD=0%Q=)U1(R=Y%DF=N%
OS:T=40%IPL=164%UN=0%RIPL=G%RID=G%RIPCK=G%RUCK=G%RUD=G)IE(R=Y%DFI=N%T=40%CD
OS:=S)
Network Distance: 2 hops
Service Info: OS: Linux; CPE: cpe:/o:linux:linux_kernel
TRACEROUTE (using port 199/tcp)
HOP RTT ADDRESS
1 38.07 ms 10.10.14.1
2 38.21 ms 10.129.49.50
OS and Service detection performed. Please report any incorrect results at https://nmap.org/submit/ .
Nmap done: 1 IP address (1 host up) scanned in 35.60 seconds
- -A: “Aggressive scan” – this switch adds OS detection (-O), version scanning (-sV), script scanning (-sC) and traceroute (–traceroute).
- -T4: This switch is used for the timing of an nmap scan. There are five different speeds and -T4 is considered aggressive but generally recommended if you are using a stable broadband or ethernet internet connection.
- -p-: This switch will scan all 65,535 possible ports. This will typically be used in all of my initial scans to avoid missing anything on the network. Additionally, you can do a simple port scan and then further enumerate ports that you know are open if time is a factor in your scenario.
In this nmap scan we scan see that port 22 is open which is using ssh. This is a fairly secure protocol and it is unlikely that this will be what leads to exploitation. We can also see that port 80 is open and using Appache 2.4.18 which is very valuable information to us as an attacker. If we navigate to the web application you will just see a “Hello World!” message but if we view the page’s source we can get some additional information.


Nothing interesting here? Ok.. you got my interest!

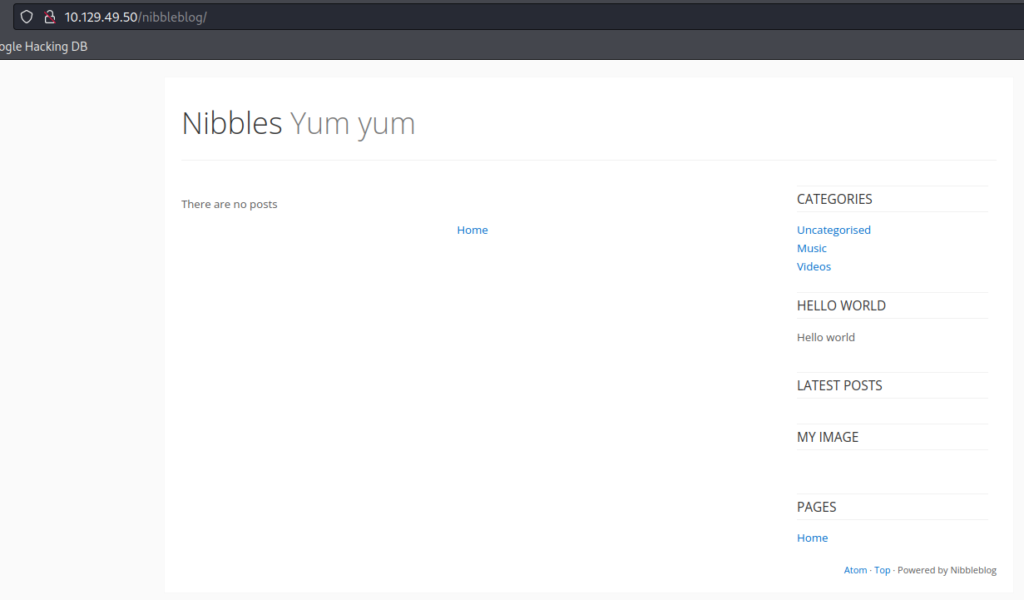
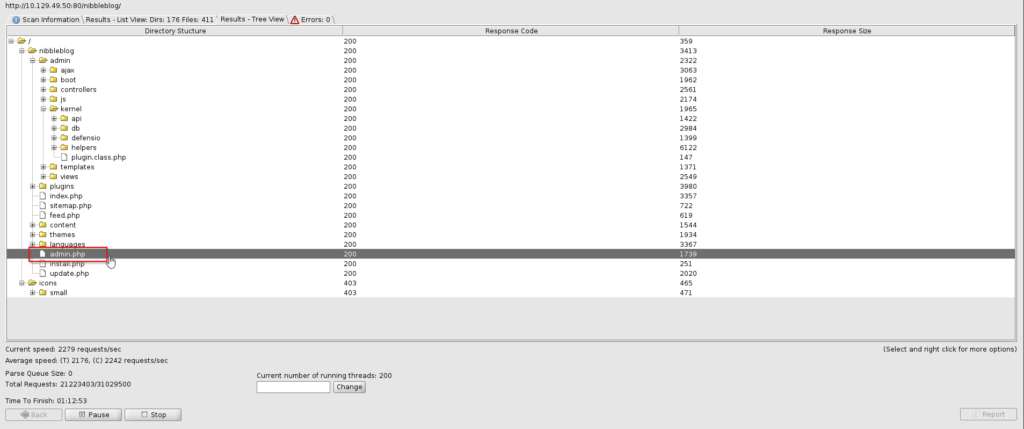
As you can see here we are now in the nibblesblog directory and our attack surface has increased greatly. There’s clearly some interesting directories tied to this web server, so one thing you could do is run a tool like Dirbuster to potentially find even more. This process can potentially take a very long time depending on what you are looking for and what kind of wordlist you are using.


Shown in the above screenshot there is still over an hour left until this enumeration will be completed, but one thing that is very nice about this tool is that we can see discovered directories/files in real time which will allow us to stay occupied. One file that really caught my eye on this machine was the admin.php file. Navigating to this will bring us a login prompt.

If you investigate further, you will find find a username of admin in ../nibbleblog/private/users.xml. Unfortunately the password cannot be found in any of the files so using a password attacking tool such as Hydra, trying default passwords, or a lucky guess will be required. Luckily here a lucky password guess of nibbles will get you in. Once you are logged in, you can find the Nibble blog version in settings.

Exploitation
If we search for Nibbleblog 4.0.3 “Coffee” exploit, we will get plenty of results. If you want an easy to use Metasploit exploit then check out this post by Rapid7. Launch up Metasploit and set your options accordingly to run the exploit and generate a meterpreter reverse tcp shell.
msfconsole > use exploit/multi/http/nibbleblog_file_upload

From here you can get user access as nibbler and obtain the user.txt from the nibbler directory. Additionally I’m sure if you are reading this, you are very familiar with the ls command but just in case you aren’t familiar with the -la, here is a brief description.
- -la: This switch combines -l (list files with additional details. This is very useful for getting permission) and -a (show all files – including hidden files)
Privilege Escalation
Congratulations on obtaining the user.txt flag! We now need to get the root.txt flag which will require root access on this machine. One of the first things we can do to check for privilege escalation is run sudo -l and see what commands we can run with sudo access.

Running commands in monitor.sh will be our route for privilege escalation but if sudo -l does not retrieve results, another great method for identifying PrivEsc opportunities would be to enter uname -a. This will get us the Linux version being used and from here we could search for a specific privilege escalation exploits targeting the identified version. A couple great scripts for PrivEsc on Linux are LinEnum.sh and linuxprivchecker.py.

The next step I’m going to perform is creating a path for sudo commands. Once this is complete, we can make a monitor.sh file.
mkdir personal > cd personal > mkdir stuff > cdstuffNow that we are in the proper directory to run a sudo command, we need to create an interactive bash shell for monitor.sh. While doing this, be sure to include chmod +x too allow the file to be executable.

The final step to this machine is to perform a sudo command targeting the full path.

Pwned! You can now see root@Nibbles and you can get the root.txt flag from the root directory. Congratulations on completing this machine and thank you for viewing this walk through. If you want to learn more about hacking then be sure to check out my other CTF walkthroughs.


